Minggu, 03 Juni 2012

0 10 Widget Hits Counter Terbaik (Bagian 1)

image Widget adalah sebuah aplikasi sederhana, menyenangkan, dan berguna yang bisa dipasang pada halaman web, blog maupun situs jejaring sosial. Kelebihan widget adalah kemudahan pemasangan dan sebagian besar widget dapat anda kustomisasi dengan mudah.

Salah satu widget yang penting untuk dipasang pada blog anda adalah widget hits counter, dimana widget ini memberikan informasi traffic pengunjung blog anda. Di internet tersedia banyak sekali widget ini dengan berbagai rupa/bentuk dan fitur, ada yang berbentuk sangat simple berupa deretan angka tanpa fitur apapun, ada yang berbentuk sangat menarik dengan animasi disertai fitur yang menunjukkan dari negara mana saja pengunjung blog anda. Sangat menarik bukan? Pada kesempatan kali ini Free Tips 4U telah memilih 10 widget hits counter terbaik untuk anda.
NeoCounter 2 dari NeoWORX 
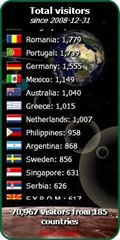
NEOCOUNTER_01 Widget yang satu ini memiliki beberapa fitur yang tidak dimiliki oleh widget yang lain. Salah satu kelebihannya adalah ada banyak pilihan untuk skin, ada lebih dari 15 pilihan. Atau bila anda bingung atau anda adalah orang bertipe pembosan, ada pilihan random skin, yang akan berganti-ganti skin secara otomatis. Selain itu ditampilkan juga bendera yang mewakili negara pengunjung. Cool!
Bila anda menyukai widget ini, bisa anda dapatkan di sini!
………………………………………………………………………
 NeoPod dari NeoWORX
image
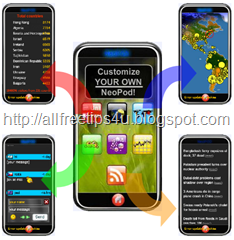
Mengambil bentuk i-Pod dari Apple, si pembuat memberinya nama NeoPod.
Pada display utama ditampilkan 7 buah ikon yang apabila anda klik, masing-masing akan memberikan informasi/fungsi yang berlainan. Oleh karena itu, widget ini merupakan kombinasi dari beberapa widget. Selain fungsi hits counter, terdapat pula chat box, feed dari seluruh penjuru dunia, dan tampilan hits counter dengan tampilan list, peta dunia, maupun bola dunia yang berputar.
Sangat menarik bukan? Untuk mendapatkannya silakan klik di sini!
……………………………………………………………………………………………………...
TrafficEstimate.com dari CreativeMind
image
Berbeda dengan widget yang lain yang ditampilkan di sini, widget ini memiliki tampilan yang sangat sederhana dan lain dari yang lain. Widget ini tidak menampilkan statistik pengunjung. Namun kelebihan dari widget ini adalah dia bisa menampilkan jumlah pengunjung ke sebuah blog dengan cara memasukkan alamat blog atau website tersebut. Setelah anda memasukkan alamat blog/website dan mengklik tombol Estimate, maka hanya dalam beberapa detik akan ditampilkan jumlah pengunjung selama kurun waktu 30 hari yang lalu.
Mungkin anda menyukai sesuatu yang sederhana seperti widget ini, misalnya, maka anda bisa mendapatkan widget tersebut di sini.
………………………………………………………………………………………………………………………….
image
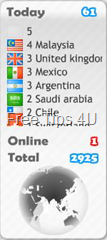
Widget yang satu ini juga terlihat simple dengan warna muda yang lembut. Memiliki fitur untuk menampilkan pengunjung dari berbagai negara disertai dengan bendera dari masing-masing negara. Selain itu, widget ini juga menampilkan jumlah kunjungan hari ini, kunjungan total, dan jumlah yang sedang online.
Anda bisa dapatkan widget tersebut dengan mengklik di sini.

…………………………………………………………………………………………

NeoCounter dari NeoWORX
image
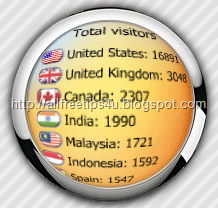
Satu lagi widget buatan NeoWORX yang terlihat sangat menarik. Dengan bentuk bulat seperti bola dengan berbagai pilihan skin yang tersedia, semakin menambah nilai plus dari widget ini.
Dapatkan widget ini di sini!


…bersambung
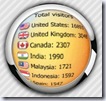
0 10 Widget Hits Counter Terbaik (Bagian 2)

NEOCOUNTER1 Berikut ini adalah kelanjutan dari 10 Widget Hits Counter Terbaik versi Free Tips 4u. Untuk merefresh kembali ingatan anda, berikut ini adalah urutan pertama sampai dengan kelima : - NeoCounter 2 dari NeoWORX
-
NeoPod dari NeoWORX
-
TrafficEstimate.com dari CreativeMind
-
GeoCounter dari BatWoman 74
-
NeoCounter dari NeoWORX
Nah, selanjutnya – to the point aja ya – berikut ini adalah urutan keenam sampai dengan kesepuluh.

realtimevisitorAPI
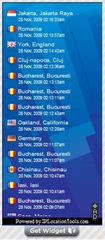
Walaupun bentuk dan ukuran mirip dengan NeoCounter 2, tetapi informasi yang ditampilkan sedikit berbeda. Mereka sama-sama menampilkan bendera dan negara visitor, tetapi perbedaannya adalah pada NeoCounter 2 ditampilkan jumlah pengunjung, sedangkan pada widget ini tidak ditampilkan jumlah pengunjung dari setiap negara, melainkan tanggal dan waktu visitor berkunjung ke sebuah blog/situs. Tinggal anda menentukan fitur mana yang anda perlukan.
Kalau anda sudah mengambil keputusan untuk menggunakan widget ini silakan ambil di sini!
--------------------------------------------------------------------------------------
TrendCounter - Free Country Flag Counter dari TrendCounter
trendcounter
Tampilan widget yang satu ini terlihat sangat sederhana namun menarik dan memberikan informasi berupa bendera, negara pengunjung dan jumlahnya. Selain itu anda masih bisa merubah warna latar belakang (background color), warna teks (font color), warna garis tepi (border color), bahkan jumlah kolom (column) dan baris (row) pun bisa anda rubah. Menarik bukan? Untuk mendapatkannya klik saja di sini!
--------------------------------------------------------------------------------------------------------------------
CONTADORDEVISITAS
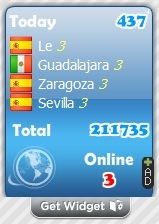
Widget ini memberikan informasi yang lengkap, bisa anda lihat dari gambar di samping ini, 5 info sekaligus dalam sebuah widget, yaitu jumlah pengunjung hari ini (Today), bendera dan negara pengunjung, jumlah pengunjung dari setiap negara, jumlah pengunjung keseluruhan sejak widget ini dipasang (Total), dan tidak ketinggalan jumlah pengunjung yang online saat itu (Online). Dan disertai dengan animasi lagi. Hebat bukan?
Saya juga mau pasang ah di blog saya ini. Mau ikutan pasang juga, klik di sini, oke?!?
--------------------------------------------------------------------------------------------------------------------
geocounter_miro77
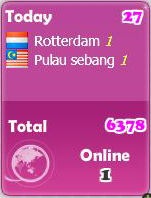
Sobat blogger, tenang, saya tidak salah memasang gambar ini. Memang widget ini dengan widget di atas (Contador De Visitas) benar-benar sama, baik dari bentuk, ukuran, bahkan display dan fiturnya pun sama. Yang membedakan hanyalah warna latar belakang. Entah yang mana yang lebih dulu membuatnya, yang pasti salah satunya adalah versi modifikasi dari aslinya. Tapi buat apa bingung, kalau anda lebih suka yang ini, silakan pakai saja. Mau? Klik di sini.
--------------------------------------------------------------------------------------------------------------------
24counter
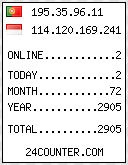
Minimalis. Sungguh sederhana, sesederhana namanya. Tapi widget yang satu ini jangan diremehkan, coba lihat informasi yang ditampilkan. Lengkap banget kan? Bahkan ditampilkan IP dari pengunjung yang sedang online.
Buat yang suka dengan sesuatu yang minimalis, ini pilihan yang cocok buat anda. Silakan ambil di sini!
---------------------------------------------------------------------------------
Nah, Free Tips 4U sudah menampilkan kesepuluh Hits Counter Widget terbaik untuk anda. Mudah-mudahan apa yang ditampilkan di sini bisa cocok dengan selera dan kebutuhan anda. Dan semoga bisa menghemat waktu anda untuk ‘surfing’ mencari-cari widget hits counter yang ideal.

0 Top 10 Hits Counter Widget (Part 2)

NEOCOUNTER1  This is the second part of ‘10 Best Hits Counter Widget’ brought to you by Free Tips 4u. To remind you, here are the top five from the first part: - NeoCounter 2 dari NeoWORX
-
NeoPod dari NeoWORX
-
TrafficEstimate.com dari CreativeMind
-
GeoCounter dari BatWoman 74
-
NeoCounter dari NeoWORX
Well, here are the next five Hits Counter Widget, picked by Free Tips 4U.


realtimevisitorAPI
Although the shape and size similar to the NeoCounter 2, but the information displayed is slightly different. They are both showing the flag and state of the visitors, but the difference is that NeoCounter 2 shows the number of visitors, while this widget is not showing the number of visitors from every state, but only the date and time visitor visit a blog or website. You can choose either one of them, just remember what feature you need the most.
If you've decided to use this widget, please take it here!
--------------------------------------------------------------------------------------
TrendCounter - Free Country Flag Counter by TrendCounter
trendcounter
This widget looks very simple but attractive and provide informations in the form of flags, state visitors and the amount of visitors. In addition you can change the background color, font color, border color, and even the number of columns and row. Interesting isn’t it? Just click to get widget here!
--------------------------------------------------------------------------------------------------------------------
CONTADORDEVISITAS This widget provides complete information, you can see from the picture on the left side, it gives you 5 kind of info only in one widget, ie. the number of visitors today, flag and country of visitors, the number of visitors from every state, the overall number of visitors since the widgets are installed (Total), and do not miss the number of visitors online at the time (Online). And with animation to make it more interesting. Great isn’t it?
I think I’m going to to place it on my blog. Do you want to have this one on your blog? Just click here, oke?!?
--------------------------------------------------------------------------------------------------------------------
geocounter_miro77
Hey, calm down, I'm not mistaken with this picture. It’s true,  this widget is exactly the same with the widget Contador De Visitas, either from the shape, size, and even the displays and even more the same features. What makes them different is  the background color. I don’t know which one is made for the first time, but I believe one of them is a modified version of the other – the original. But why bother, if you prefer this one, please, just use it. Do you want it? Click here.
--------------------------------------------------------------------------------------------------------------------
24counter
Minimalist. It is very simple, as simple as its name. But this widget is something you cannot resist, just look at the information shown. Complete, right? Even more it is showing the IP of online visitors.
So, if you love something minimalist, this is a great choice for you. Please get it here!
---------------------------------------------------------------------------------
Well, Free Tips 4U has giving you ten Hits Counter widget – the best - for you. Hopefully, one of the widgets meet your taste and needs. And hopefully you can save time for 'surfing' through the internet to search the ideal hits counter widget.

Navigation Menu With Sub-Menus

Bahasa | English
Today I will explain how to make navigation menu with sub-menu like sample shown below. Try moving your cursor over the menu Blogger Template and see what happen. You will see that the menu expand and show sub-menus.
By installing this menu on your blog, it will make your blog more interesting. For blog owner, you can categorized the contents easily. And for your blog's visitor, of course, they will explore your blog easier and easily choose the categories they like. You can see live demo here.
The navigation menu I’m going to explain is not using javascript. It is built using HTML and CSS. So, I believe you will find it very easy to install it on your blog.
Well, it’s time to let you know how to install this menu on your blog. As usual, you need to login to www.blogger.com and directly go to Edit HTML. Before precede to the next step, remember to back-up your template first.
  1. Find this code ]]></b:skin>
  2. Paste the code below right above the previous code. The code in red is the code for width of menu area. Mostly the width is the same with the body width of your template. Change the value to suit your template.
    #NavbarMenu { background: #000; width: 874px; height: 35px; font-size: 13px; font-family: Arial, Tahoma, Verdana; color: #fff; font-weight: bold; margin: 0px; padding: 0px; } #NavbarMenuleft { width: 874px; float: left; margin: 0; padding: 0; } #nav { margin: 0; padding: 0; } #nav ul { float: left; list-style: none; margin: 0; padding: 0; } #nav li { list-style: none; margin: 0; padding: 0; } #nav li a, #nav li a:link, #nav li a:visited { background: #808080; height: 24px; color: #fff; display: block; font-size: 14px; font-family: trebuchet ms, Times New Roman; font-weight: bold; text-transform: none; text-decoration: none; margin: 0; padding-top:6px; padding-bottom:5px; padding-left:13px; padding-right:13px; border-right: 1px solid #000; } #nav li a:hover, #nav li a:active {background: #c0c0c0; color: #000; margin: 0; padding-top:6px; padding-bottom:5px; padding-left:13px; padding-right:13px; text-decoration: none; } #nav li li a, #nav li li a:link, #nav li li a:visited { background: #c0c0c0; width: 150px; color: #000; font-size: 14px; font-family: trebuchet ms, Times New Roman; font-weight: normal; text-transform: none; float: none; margin: 0; padding: 7px 10px; border: 1px solid #000; } #nav li li a:hover, #nav li li a:active { background: #000; color: #fff; padding: 7px 10px; } #nav li { float: left; padding: 0; } #nav li ul { z-index: 9999; position: absolute; left: -999em; height: auto; width: 170px; margin: 0; padding: 0; } #nav li ul a { width: 140px; } #nav li ul ul { margin: -32px 0 0 171px; } #nav li:hover ul ul, #nav li:hover ul ul ul, #nav li.sfhover ul ul, #nav li.sfhover ul ul ul { left: -999em; } #nav li:hover ul, #nav li li:hover ul, #nav li li li:hover ul, #nav li.sfhover ul, #nav li li.sfhover ul, #nav li li li.sfhover ul { left: auto; } #nav li:hover, #nav li.sfhover { position: static; }
  3. Before precede to the next step, you need to determine the location of the menu on your blog. Mostly, the menu position is either on the top (above the header) or below the header block. In this sample I put the menu above the header then you have to look for this code <div id='header-wrapper'>
  4. Paste the code below above the previous code.
    <div id='NavbarMenu'>
    <div id='NavbarMenuleft'>
    <ul id='nav'>
    <li><a href='http://allfreetips4u.blogspot.com'>Home</a> </li>
    <li><a href='#'>Blogger Template</a>
    <ul>
            <li><a href='http://allfreetips4u.blogspot.com/search/label/2 column'>2 Column</a> </li>
            <li><a href='http://allfreetips4u.blogspot.com/search/label/3 column'>3 Column</a> </li>
            <li><a href='http://allfreetips4u.blogspot.com/search/label/4 column'>4 Column</a> </li> </ul> </li>
    <li><a href='#'>Blogging Trick</a> </li>
    <li><a href='#'>Forum</a>
    <ul>
           <li><a href='http://allfreetips4u.blogspot.com/search/label/Learn SEO'>Learn SEO</a> </li>
           <li><a href='http://allfreetips4u.blogspot.com/search/label/Adsense'>Adsense</a> </li>
           <li><a href='http://allfreetips4u.blogspot.com/search/label/Blog Monetize'>Blog Monetize</a> </li>
          <li><a href='http://allfreetips4u.blogspot.com/search/label/Link Exchange'>Link Exchange</a> </li>
    </ul> </li> </ul>
    </div> </div>
  5. Now, it’s time to change some codes to meet your needs. The blue code is url-link and the red code is the anchor-text or the title of menu or sub-menu related to the link. For example Home menu. If you click on the Home menu, you’ll go to main page, so change the url with your blog’s url. Another example for Blogger Template menu. If you click the menu, it will take you to a page or pages that show postings with ‘blogger template’ label. So, you can change the url like this http://blogname.blogspot.com/search/label/blogger template. Change blogname with your blog’s name.
  6. You can add or subtract the menu and submenu as you like. To add menu, just repeat the code as many time as you like. To subtract menu or sub-menu, you can remove the code.
  7. And that’s it. Don’t forget to save your work.
  8. Now your blog looks more interesting.

0 Galeri Imej Cantik Untuk Blogger

Halo semuanya…
Baru-baru ini saya jalan-jalan ke ‘rumah’ tetangga dan menemukan ‘sesuatu’ yang menurut saya sangat menarik dan bila dipasang di blog, pasti akan membuat blog tampak lebih oke. Si pencipta – Stu Nicholls – menyebut fitur ini dengan sebutan “A permanent image click gallery with up/down thumbnails”. Biar lebih jelas lihat deh demonya di sini atau buat yang ‘malas’ lihat screenshot di bawah ini:
image

Kamu bisa lihat di sebelah kanan, terdapat  jendela yang menampilkan gambar dalam ukuran ‘full’ apabila kamu klik ‘thumbnail’ di sebelah kanan. Sedangkan di bagian bawah disediakan baris untuk menempatkan teks dan link.
Dan fitur ini tidak menggunakan JavaScript, hanya CSS dan HTML.
Mau pasang ini di blog kamu? Nah pada kesempatan ini saya akan memberikan cara memasang fitur ini di blog kamu.
  1. Seperti biasa login ke www.blogger.com > Tata Letak > Edit HTML
  2. Jangan lupa untu mem-back up dulu template kamu
  3. Letakkan kode di bawah ini tepat di atas ]]></b:skin>
    /* ================================================================ This copyright notice must be untouched at all times. The original version of this stylesheet and the associated (x)html is available at http://www.cssplay.co.uk/menu/double-click-gallery-vertical.html Copyright (c) 2005-2009 Stu Nicholls. All rights reserved. This stylesheet and the associated (x)html may be modified in any way to fit your requirements. =================================================================== */ #gallery { width:750px; height:550px; margin:0 auto; position:relative; font-family:verdana, arial, sans-serif; background:#fff; } #gallery #slides {position:absolute; right:10px; top:0; height:550px; width:92px; overflow:hidden; text-align:center; z-index:500;} #gallery #slides div {width:92px; height:550px; position:relative; padding-top:10px;} #gallery #slides div ul {padding:0; margin:0; list-style:none; width:92px; height:550px} #gallery #slides div ul li {float:left; padding:1px 0; width:92px; height:69px;} #gallery #slides div ul li a {display:block; width:92px; height:69px; float:left;} #gallery #slides div ul li a b {display:none;} #gallery #slides div ul li a.previous {background:url(http://www.cssplay.co.uk/menu/double-click/up.png) no-repeat center center;} #gallery #slides div ul li a.next {background:url(http://www.cssplay.co.uk/menu/double-click/down.png) no-repeat center center;} #gallery #slides div ul li a img {display:block; width:92px; height:69px; border:0;} #gallery #slides div ul li img.blank {margin:0 auto; padding-top:11px;} #gallery #slides div ul li a:focus {outline:0;} #gallery #fullsize {position:absolute; left:0; top:0; height:550px; width:750px; overflow:hidden; text-align:center; z-index:200;} #gallery #fullsize div {width:750px; height:700px; padding-top:70px; position:relative;} #gallery #fullsize div img {clear:both; display:block; margin:0 auto; border:1px solid #eee; width:480px; height:360px; position:relative; background:#fff; padding:10px;} #gallery #fullsize div h3 {padding:10px 0 0 0; margin:0; font-size:18px;} #gallery #fullsize div p {padding:5px 135px; margin:0; font-size:12px; line-height:18px;}
  4. Dalam kasus ini, fitur akan diletakkan di bawah header, maka carilah kode berikut ini:
    <div id='header-wrapper'>
    <div id='head-inner'>
    <b:section class='header' id='header' maxwidgets='1' showaddelement='no'>
    <b:widget id='Header1' locked='true' title='Free Tips II (Header)' type='Header'/>
    </b:section> </div> <div id='r_head'> <b:section class='header' id='header2' preferred='yes'/>
    </div>
    </div>
  5. Lalu letakkan kode di bawah ini tepat di bawah kode header.
    <div id='gallery'>
        <div id='slides'>
            <div id='slide1'>
                <ul>
                    <li><img alt='' class='blank' src='http://www.cssplay.co.uk/menu/double-click/upx.png'/></li>
                    <li><a href='#pic1'><img alt='Winter branches' src='http://www.cssplay.co.uk/menu/double-click/pic1.jpg'/></a></li>
                    <li><a href='#pic2'><img alt='Wading birds' src='http://www.cssplay.co.uk/menu/double-click/pic2.jpg'/></a></li>
                    <li><a href='#pic3'><img alt='Bird on a post' src='http://www.cssplay.co.uk/menu/double-click/pic3.jpg'/></a></li>
                    <li><a href='#pic4'><img alt='Early bloomers' src='http://www.cssplay.co.uk/menu/double-click/pic4.jpg'/></a></li>
                    <li><a href='#pic5'><img alt='Green lizard' src='http://www.cssplay.co.uk/menu/double-click/pic5.jpg'/></a></li>
                    <li><a class='next' href='#slide2'><b>Next</b></a></li>
                </ul>
            </div>
            <div id='slide2'>
                <ul>
                    <li><a class='previous' href='#slide1'><b>Previous</b></a></li>
                    <li><a href='#pic2'><img alt='Wading birds' src='http://www.cssplay.co.uk/menu/double-click/pic2.jpg'/></a></li>
                    <li><a href='#pic3'><img alt='Bird on a post' src='http://www.cssplay.co.uk/menu/double-click/pic3.jpg'/></a></li>
                    <li><a href='#pic4'><img alt='Early bloomers' src='http://www.cssplay.co.uk/menu/double-click/pic4.jpg'/></a></li>
                    <li><a href='#pic5'><img alt='Green lizard' src='http://www.cssplay.co.uk/menu/double-click/pic5.jpg'/></a></li>
                    <li><a href='#pic6'><img alt='Feeding the birds' src='http://www.cssplay.co.uk/menu/double-click/pic6.jpg'/></a></li>
                    <li><a class='next' href='#slide3'><b>Next</b></a></li>
                </ul>
            </div>
            <div id='slide3'>
                <ul>
                    <li><a class='previous' href='#slide2'><b>Previous</b></a></li>
                    <li><a href='#pic3'><img alt='Bird on a post' src='http://www.cssplay.co.uk/menu/double-click/pic3.jpg'/></a></li>
                    <li><a href='#pic4'><img alt='Early bloomers' src='http://www.cssplay.co.uk/menu/double-click/pic4.jpg'/></a></li>
                    <li><a href='#pic5'><img alt='Green lizard' src='http://www.cssplay.co.uk/menu/double-click/pic5.jpg'/></a></li>
                    <li><a href='#pic6'><img alt='Feeding the birds' src='http://www.cssplay.co.uk/menu/double-click/pic6.jpg'/></a></li>
                    <li><a href='#pic7'><img alt='A group of butterflies' src='http://www.cssplay.co.uk/menu/double-click/pic7.jpg'/></a></li>
                    <li><a class='next' href='#slide4'><b>Next</b></a></li>
                </ul>
            </div>
            <div id='slide4'>
                <ul>
                    <li><a class='previous' href='#slide3'><b>Previous</b></a></li>
                    <li><a href='#pic4'><img alt='Early bloomers' src='http://www.cssplay.co.uk/menu/double-click/pic4.jpg'/></a></li>
                    <li><a href='#pic5'><img alt='Green lizard' src='http://www.cssplay.co.uk/menu/double-click/pic5.jpg'/></a></li>
                    <li><a href='#pic6'><img alt='Feeding the birds' src='http://www.cssplay.co.uk/menu/double-click/pic6.jpg'/></a></li>
                    <li><a href='#pic7'><img alt='A group of butterflies' src='http://www.cssplay.co.uk/menu/double-click/pic7.jpg'/></a></li>
                    <li><a href='#pic8'><img alt='Ladybirds' src='http://www.cssplay.co.uk/menu/double-click/pic8.jpg'/></a></li>
                    <li><a class='next' href='#slide5'><b>Next</b></a></li>
                </ul>
            </div>
            <div id='slide5'>
                <ul>
                    <li><a class='previous' href='#slide4'><b>Previous</b></a></li>
                    <li><a href='#pic5'><img alt='Green lizard' src='http://www.cssplay.co.uk/menu/double-click/pic5.jpg'/></a></li>
                    <li><a href='#pic6'><img alt='Feeding the birds' src='http://www.cssplay.co.uk/menu/double-click/pic6.jpg'/></a></li>
                    <li><a href='#pic7'><img alt='A group of butterflies' src='http://www.cssplay.co.uk/menu/double-click/pic7.jpg'/></a></li>
                    <li><a href='#pic8'><img alt='Ladybirds' src='http://www.cssplay.co.uk/menu/double-click/pic8.jpg'/></a></li>
                    <li><a href='#pic9'><img alt='Butterfly' src='http://www.cssplay.co.uk/menu/double-click/pic9.jpg'/></a></li>
                    <li><a class='next' href='#slide6'><b>Next</b></a></li>
                </ul>
            </div>
            <div id='slide6'>
                <ul>
                    <li><a class='previous' href='#slide5'><b>Previous</b></a></li>
                    <li><a href='#pic6'><img alt='Feeding the birds' src='http://www.cssplay.co.uk/menu/double-click/pic6.jpg'/></a></li>
                    <li><a href='#pic7'><img alt='A group of butterflies' src='http://www.cssplay.co.uk/menu/double-click/pic7.jpg'/></a></li>
                    <li><a href='#pic8'><img alt='Ladybirds' src='http://www.cssplay.co.uk/menu/double-click/pic8.jpg'/></a></li>
                    <li><a href='#pic9'><img alt='Butterfly' src='http://www.cssplay.co.uk/menu/double-click/pic9.jpg'/></a></li>
                    <li><a href='#pic10'><img alt='Trees in the mist' src='http://www.cssplay.co.uk/menu/double-click/pic10.jpg'/></a></li>
                    <li><img alt='' class='blank' src='http://www.cssplay.co.uk/menu/double-click/downx.png'/></li>
                </ul>
            </div>
        </div>
        <div id='fullsize'>
            <div id='pic1'>
                <img alt='Winter branches' src='http://www.cssplay.co.uk/menu/double-click/pic1.jpg'/>
                <h3>Winter branches</h3>
                <p>Followed by some descriptive text and maybe a <a href='http://www.cssplay.co.uk/'>link</a>.</p>
            </div>
            <div id='pic2'>
                <img alt='Wading birds' src='http://www.cssplay.co.uk/menu/double-click/pic2.jpg'/>
                <h3>Wading birds</h3>
                <p>Another piece of descriptive text and again a <a href='http://www.cssplay.co.uk/'>link</a>.</p>
            </div>
            <div id='pic3'>
                <img alt='Bird on a post' src='http://www.cssplay.co.uk/menu/double-click/pic3.jpg'/>
                <h3>Bird on a post</h3>
                <p>Yet more descriptive text and maybe a <a href='http://www.cssplay.co.uk/'>link</a>.</p>
            </div>
            <div id='pic4'>
                <img alt='Early bloomers' src='http://www.cssplay.co.uk/menu/double-click/pic4.jpg'/>
                <h3>Early bloomers</h3>
                <p>And another line of descriptive text and maybe a <a href='http://www.cssplay.co.uk/'>link</a>.</p>
            </div>
            <div id='pic5'>
                <img alt='Green lizard' src='http://www.cssplay.co.uk/menu/double-click/pic5.jpg'/>
                <h3>Green lizard</h3>
                <p>With descriptive text and maybe a <a href='http://www.cssplay.co.uk/'>link</a>.</p>
            </div>
            <div id='pic6'>
                <img alt='Feeding the birds' src='http://www.cssplay.co.uk/menu/double-click/pic6.jpg'/>
                <h3>Feeding the birds</h3>
                <p>A description of the picture can go here with a <a href='http://www.cssplay.co.uk/'>link</a>.</p>
            </div>
            <div id='pic7'>
                <img alt='A group of butterflies' src='http://www.cssplay.co.uk/menu/double-click/pic7.jpg'/>
                <h3>A group of butterflies</h3>
                <p>Descriptive text and maybe a <a href='http://www.cssplay.co.uk/'>link</a>.</p>
            </div>
            <div id='pic8'>
                <img alt='Ladybirds' src='http://www.cssplay.co.uk/menu/double-click/pic8.jpg'/>
                <h3>Ladybirds</h3>
                <p>The text can be over as many lines as you want, but you may need to adjust the size of the containing div to make sure that it can all be seen. The <a href='http://www.cssplay.co.uk/'>link</a> can be used if you want.</p>
            </div>
            <div id='pic9'>
                <img alt='Butterfly' src='http://www.cssplay.co.uk/menu/double-click/pic9.jpg'/>
                <h3>Butterfly</h3>
                <p>Followed by some descriptive text and maybe a <a href='http://www.cssplay.co.uk/'>link</a>.</p>
            </div>
            <div id='pic10'>
                <img alt='Trees in the mist' src='http://www.cssplay.co.uk/menu/double-click/pic10.jpg'/>
                <h3>Trees in the mist</h3>
                <p>Another piece of descriptive text and maybe a <a href='http://www.cssplay.co.uk/'>link</a>.</p>
            </div>
        </div>
    </div>
    <p class='info'>Copyright 2009 stu nicholls - CSS play</p>

    Keterangan:
    Warna ungu adalah url dari gambar - berurutan - dari gambar 1 sampai dengan gambar terakhir.
    Warna hijau adalah judul dari gambar
    Warna biru adalah keterangan gambar dan link
  6. Sehingga kodenya menjadi seperti ini:image
  7. Lalu simpan perubahan yang telah kamu lakukan.
  8. Lihat hasilnya di blog kamu.
Ingat, jangan merubah credit link dari si pembuat fitur ini! Sebagai bentuk penghormatan atas kerja kerasnya menciptakan suatu fitur yang indah seperti ini dan sebagai manusia yang beradab – sekali lagi – jangan merubah/menghilangkan credit link yang terdapat di dalam skrip. Si pembuat membolehkan kita semua menggunakan fitur ini, tetapi khusus untuk penggunaan komersial kamu harus meminta ijin tertulis dari si pembuat. Kamu bisa lihat detilnya di situs si pembuat dengan mengklik link ini.
Saat ini saya sedang membuat template baru dengan memasukkan fitur ini di dalamnya. Tunggu ya kehadirannya!

Related Posts Plugin for WordPress, Blogger...